HOW TO:
ADJUST YOUR PRESSURE SWITCH
TAKE CAUTION!
Adjustments should only be made when the switch is not mounted, not under pressure, and voltage free.
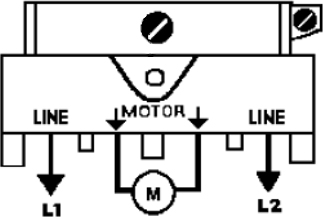
Each Phoenix switch has a low and a high pressure setting point, also known as the cut-in and the cut-out pressure points. These are simply the two pressure levels at which the compressor or pump will start or stop. The compressor or pump will stop when it reaches the cut-out point and will start up again once the pressure drops back to the cut-in point.
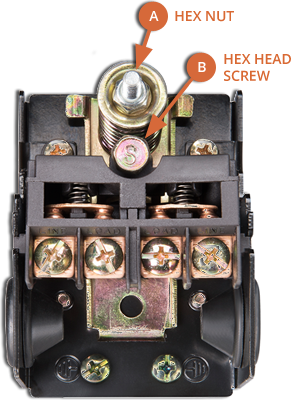
69ES-type Switch Adjustment
-
Turn hex nut (A) clockwise to increase the pressure range or turn hex nut (A) counterclockwise to decrease the pressure range (both cut-in and cut-out).
-
Turn hex head screw (B) clockwise to increase cut-out pressure range or turn hex head screw (B) counterclockwise to decrease cut-out pressure.
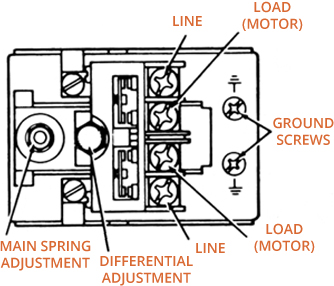
69H-type Switch Adjustment
-
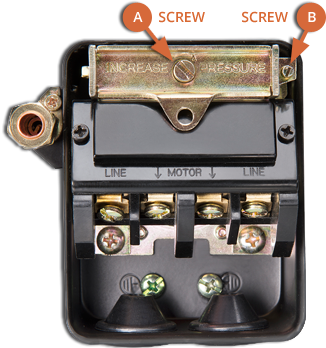
Turn screw “A” clockwise to increase the pressure range or turn screw “A” counterclockwise to decrease the pressure range (both cut-in / cut-out).
-
Turn screw “B” clockwise to increase cut-out pressure or turn screw “B” counterclockwise to decrease cut-out pressure.
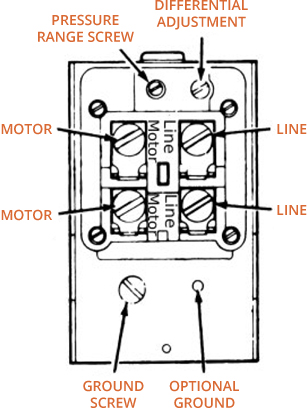
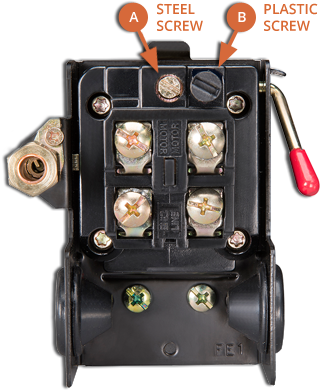
69M-type Switch Adjustment
-
Turn steel screw (A) clockwise to increase the pressure range or turn steel screw (A) counterclockwise to decrease the pressure range (both cut-in / cut-out).
-
Turn plastic screw (B) clockwise to increase cut-out pressure or turn plastic screw (B) counterclockwise to decrease cut-out pressure.